
CASTING DIRECTOR: How do I use FastCapture with Cast It Systems?
This article explains how to set up and use FastCapture to record auditions and upload them directly to Cast It Systems. It covers the necessary account prerequisites, how to prepare your project on Casting Networks, and the steps to record and manage your session.
Important Prerequisites
Account Requirement: You must have a Casting Networks casting account to use FastCapture for Cast It. Ensure the same email address is used for both your Cast It and Casting Networks accounts.
Project Setup: The Cast It project and roles must be built on Casting Networks prior to using FastCapture. The project does not have to be active, and all roles can be internal.
Role Management: You only need to add the specific roles to Casting Networks that you intend to upload via FastCapture.
Preparing your Project on Casting Networks
Before opening FastCapture, you must ensure the project exists on the Casting Networks side.
Log in to Casting Networks.
Re-create your Cast It project as a new project on Casting Networks.
You can fill out the bare minimum information.
You do not have to release the project.
Add the roles from Cast It to the project you just built on Casting Networks.
Remember, you only need to add the roles you are uploading to via FastCapture.
These can be set as Internal Roles. This means you do not have to publish or distribute them, but they must exist within the project.
Setting Up Fastcapture
1. Log in to FastCapture.
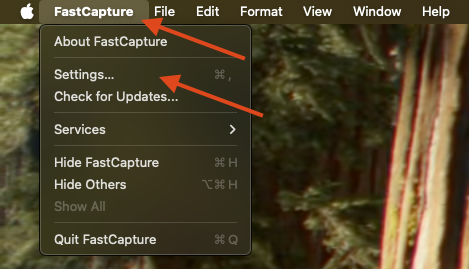
2. Click on FastCapture in the top bar and select Settings...
3. Select the Integrate tab.
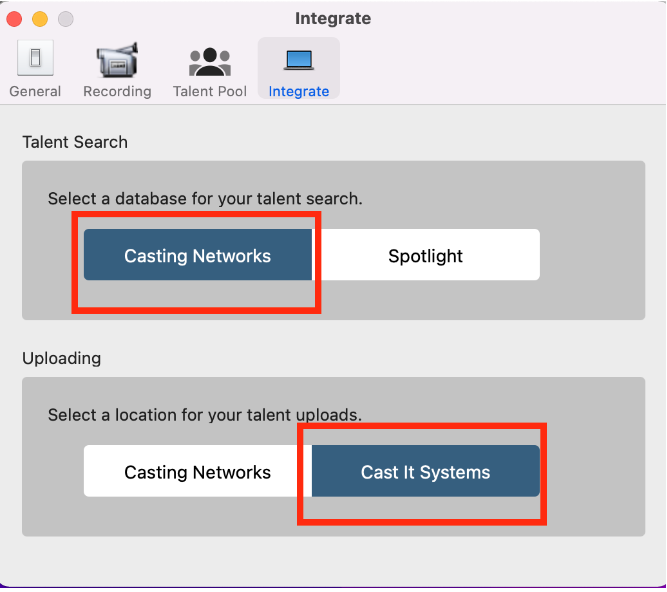
4. Select Casting Networks for the "Talent Search" spot.
5. Select Cast It Systems for the "Uploading" spot.
6. Select the Restart FastCapture option in the pop-up.
7. Select Create a new FastCapture File.
8. Log in with your Casting Networks credentials first.
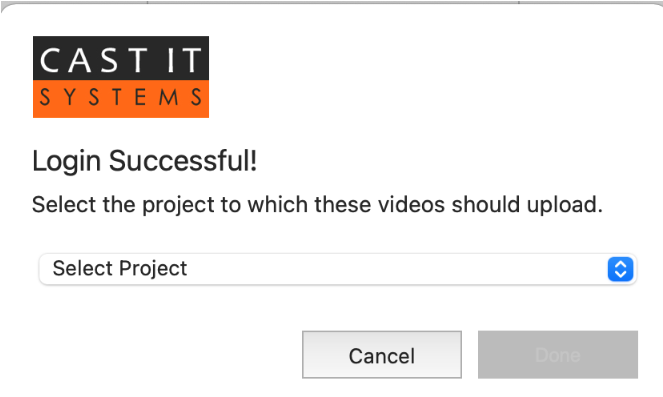
9. Log in with your Cast It Systems credentials second.
Note: Your Cast It Systems and Casting Networks passwords may differ. Casting Networks requires a special character, whereas Cast It Systems does not allow special characters
10. Select the Project from the drop-down menu and press Done.
11. Select the project from the middle column titled "Select a Project".
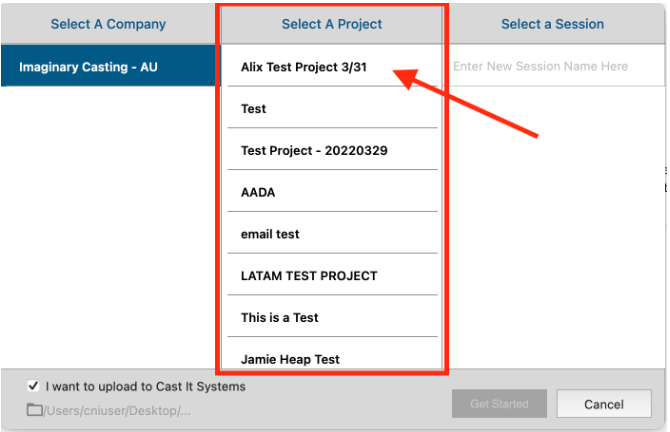
12. Enter a new Session Name.
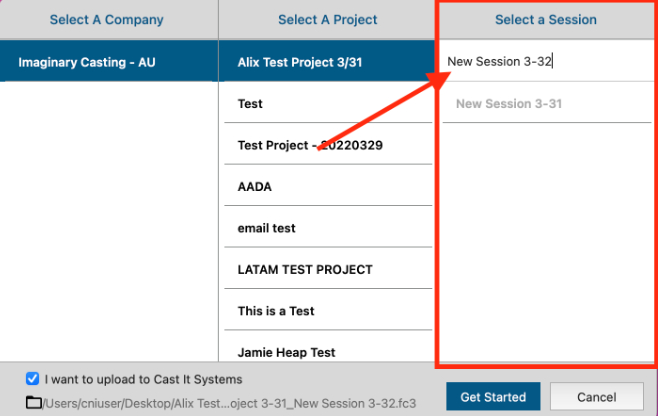
13. Make sure the "I want to upload to Cast It Systems" button is checked.
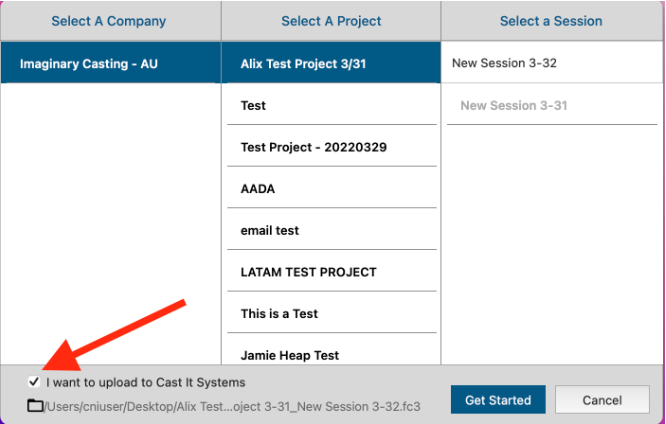
14. Press the Get Started button.
Adding Talent and Recording
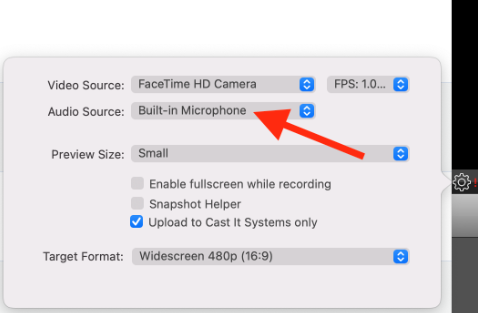
1. Audio Setup: If using an external camera to record, ensure your audio settings are connected to that camera by clicking on the gear symbol next to the "WARNING" label.

2. Click Add Talent at the top of the screen and press Quick Add.
3. Input the Talent's first and last name exactly as it appears on Cast It Systems.
For the phone number, you can enter random numbers (this does not matter for the upload).
4. Select NON-REPPED for representation. Do not select the defaulted "Non-Represented".
Note: This information does not transfer to Cast It Systems.
5. Choose the role you created on the Casting Networks side via the Role drop-down menu.
6. Select the Add to talent pool only option.
7. Repeat steps 2 through 6 for all talent you are seeing in this session.
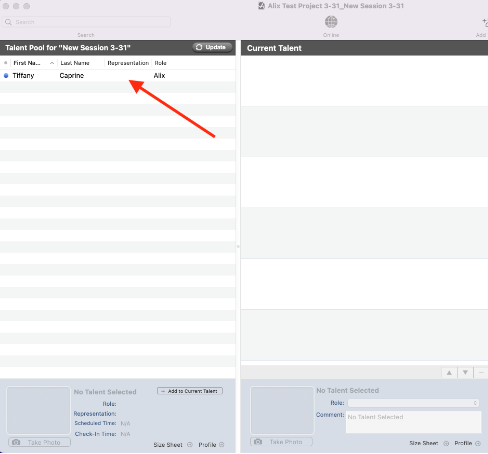
8. When you are ready to record, drag the talent's name from the left side (Talent Pool) to the middle of the page (Current Talent).

9. Click the Record button to start or stop recording, or press the spacebar on your keyboard.
10. Each take you record will appear in the media bin below the video preview window.
Editing or Deleting Clips
To edit or add a description: Double-click on the clip (e.g., to add "slate" or "s1t1"). You can trim or crop any part of the clip here and add descriptions above the video timeline.
To delete a clip: Click on the clip you want to delete and press Command+Delete. The clip can still be recovered from the computer's Trash.
Note: If using FastCapture version .256, you will not be able to use Command+Delete. You must right-click on the clip and select "Move to trash".
When finished with an actor, click Finalize Group to upload immediately, or Save Draft to edit later.
To recall a saved draft, access it from the QUEUE.
Verifying Uploads on Cast It Systems
Log in to Cast It Systems and click into the project you are working on.
Expand the role that you used FastCapture to upload to.
Click on the talent's videos to the right of the talent's name to ensure the uploads were completed correctly.