CASTING DIRECTOR: How do I use the Bulk Uploader feature?
This is a quick overview for Casting Directors using the bulk uploading feature on Cast It. This will help you import multiple videos to multiple actors within a project.
DISCLAIMER: You can only assign videos to a project & an episode within a series, not a series itself.
Upload From the Projects Page
Login to your Cast It account and select Bulk Uploader.
Press Select Files and select the files you want to upload from your computer's finder.

Let the file upload to the bulk uploader.
Once it is uploaded, you will see it at the top of the list of files.
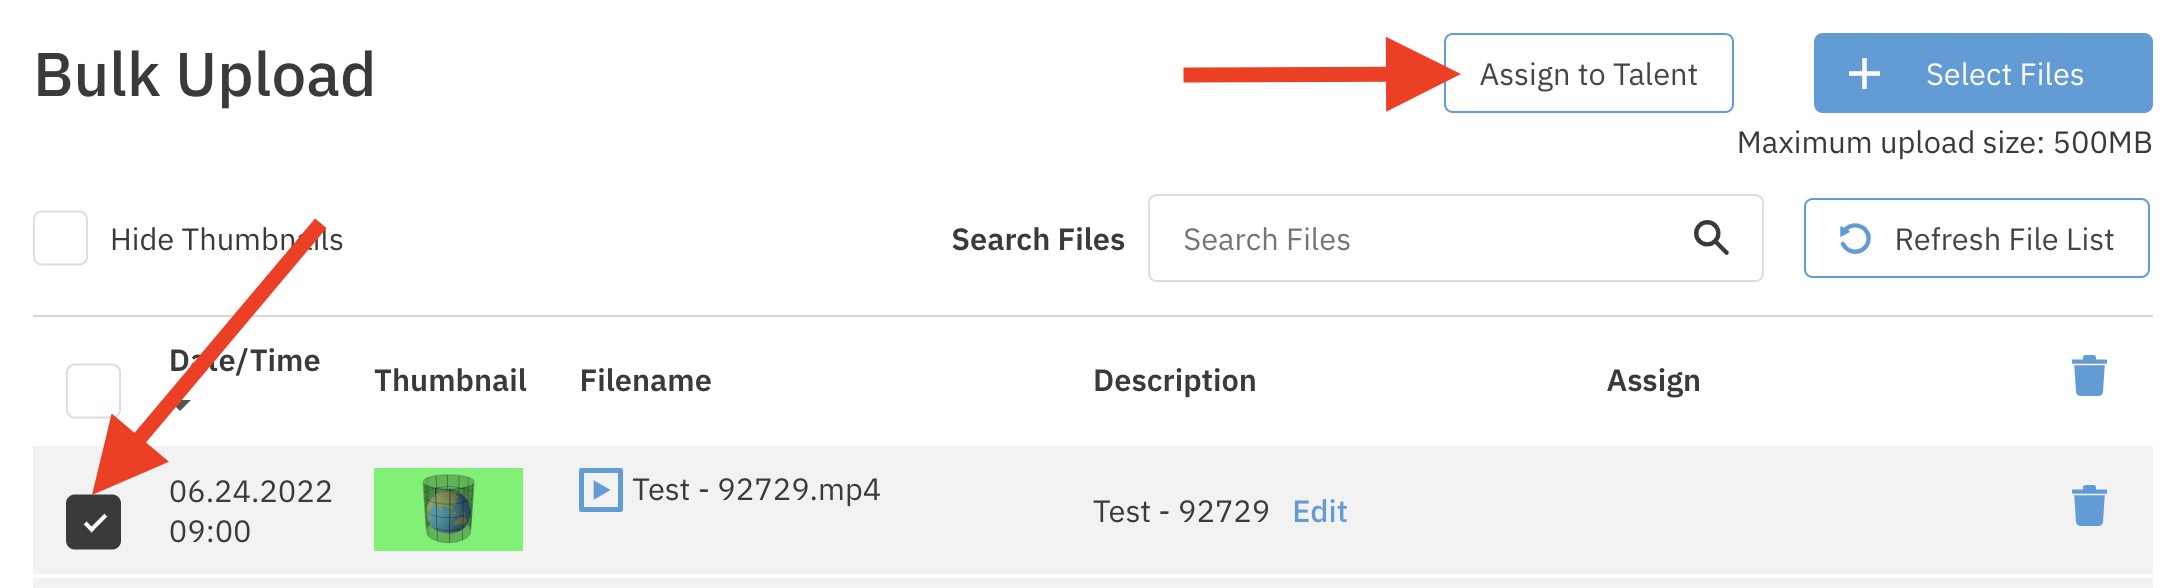
Select the checkbox to the left of the video and press Assign to Talent - this will allow you to assign the video to a specific talent.
NOTE: You can assign multiple videos to the same talent at once, just check off all of the videos you want to assign at the same time.
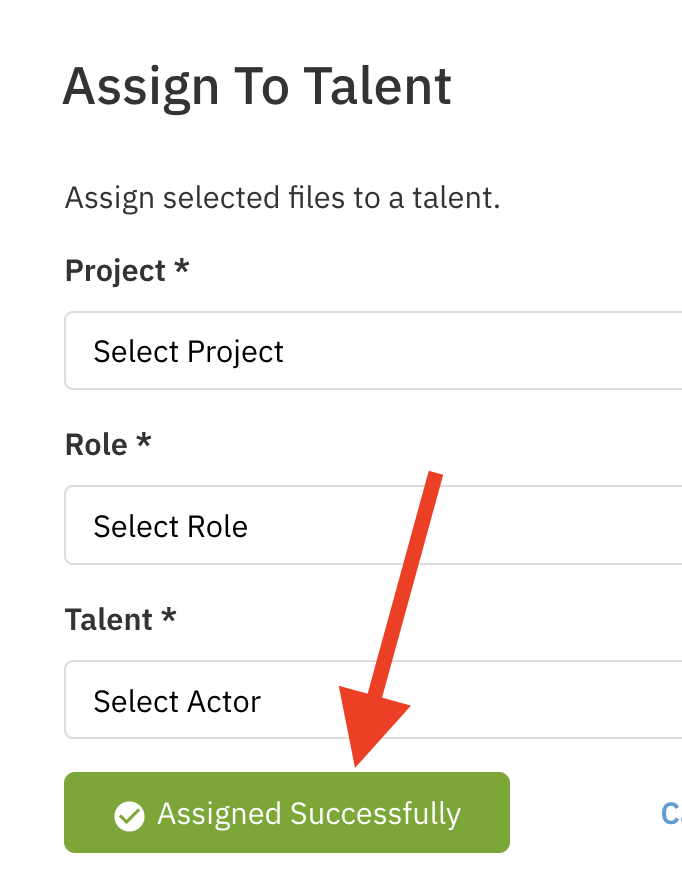
Select the following:
Project - the project you want to assign the video to (you cannot assign it to a series, only an episode within a series).
Role - the role you want to assign the video to.
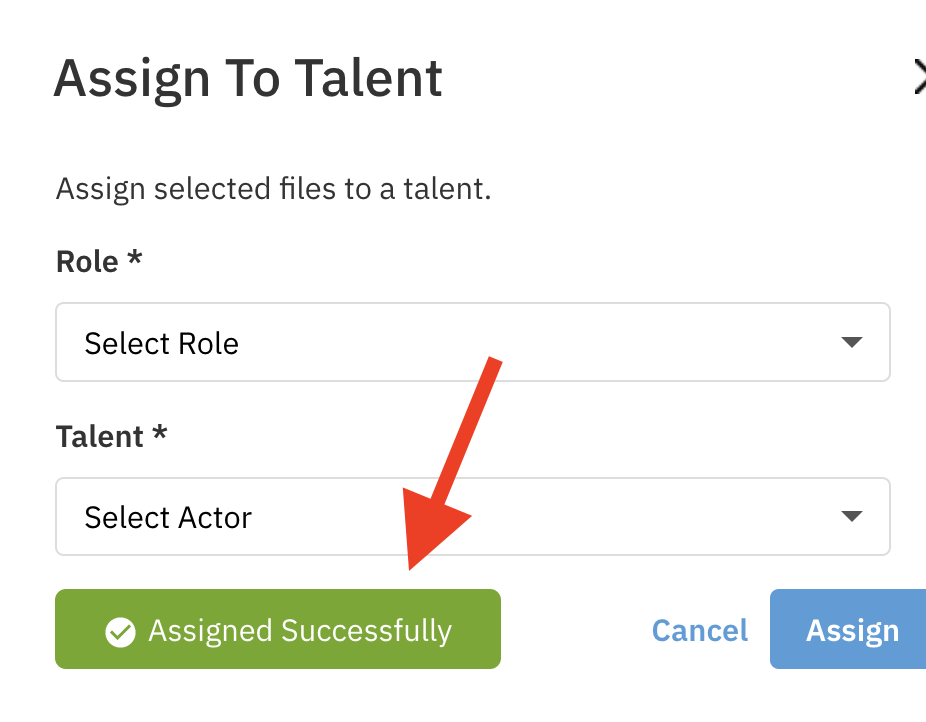
Talent - the talent you want to assign the video to.

Press the blue Assign button.
Look for the green Assigned Successfully label to confirm that the video was assigned to the talent of your choosing.
Upload From Within a Project
Login to your Cast It profile.
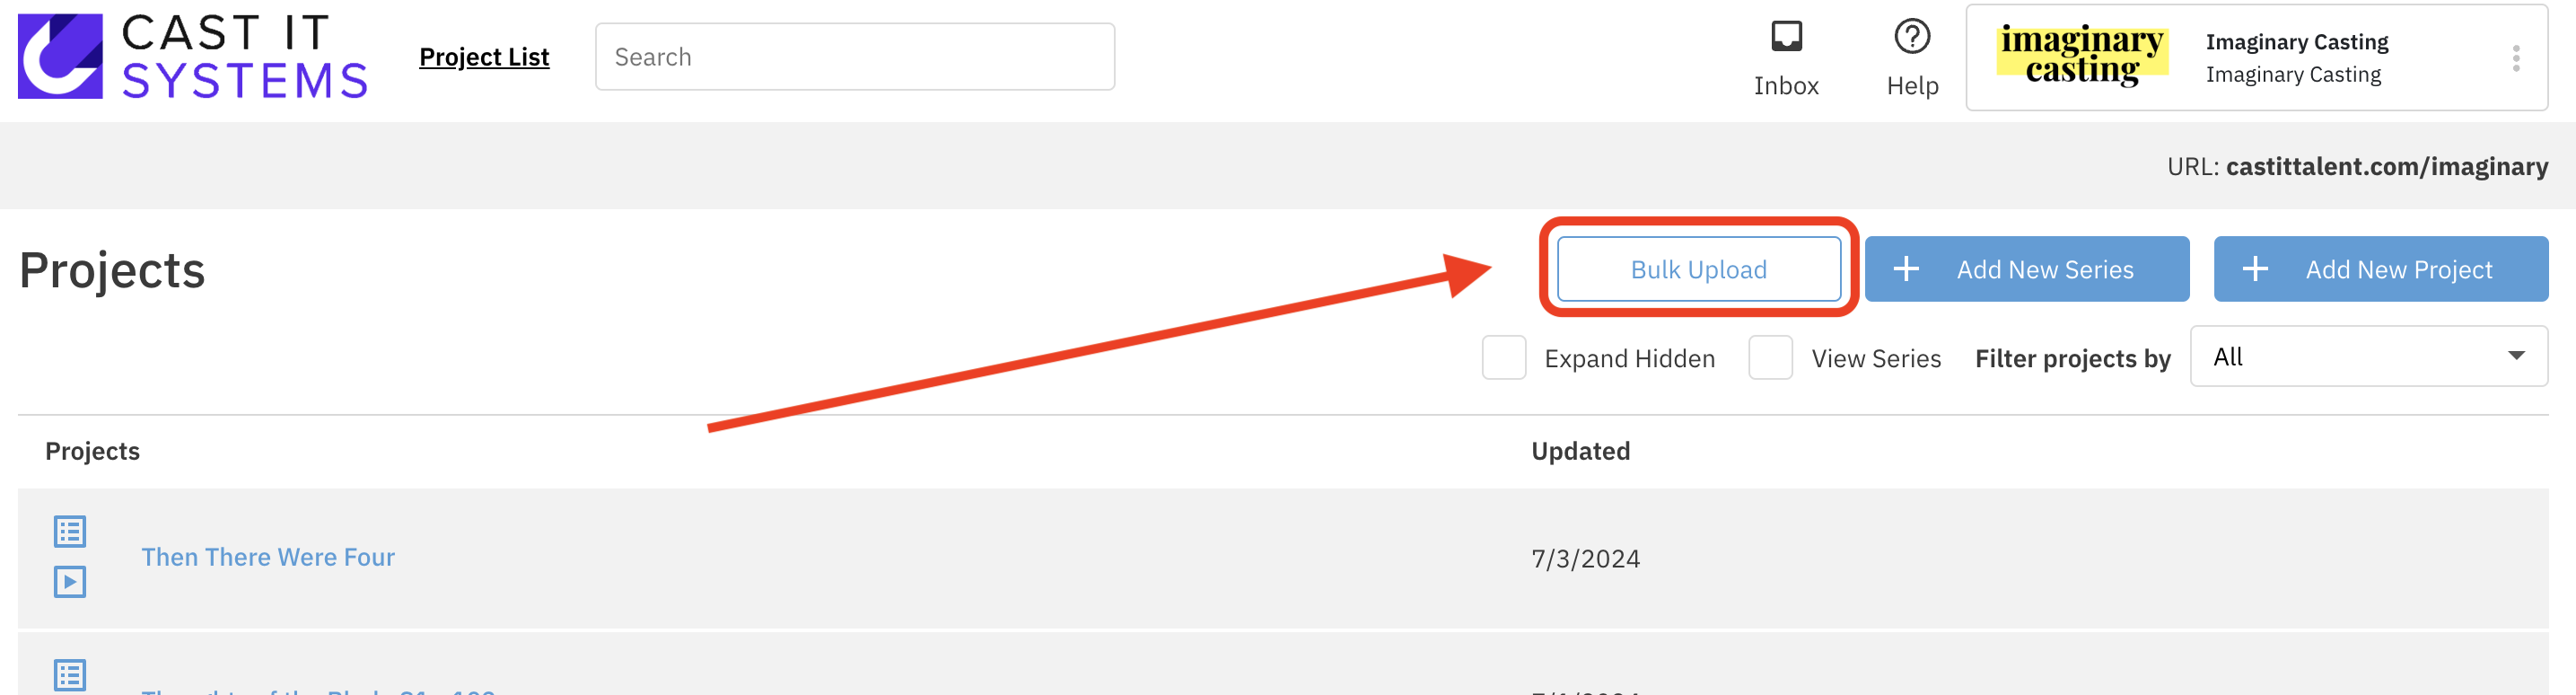
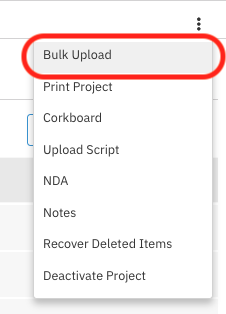
Select the overflow menu button.
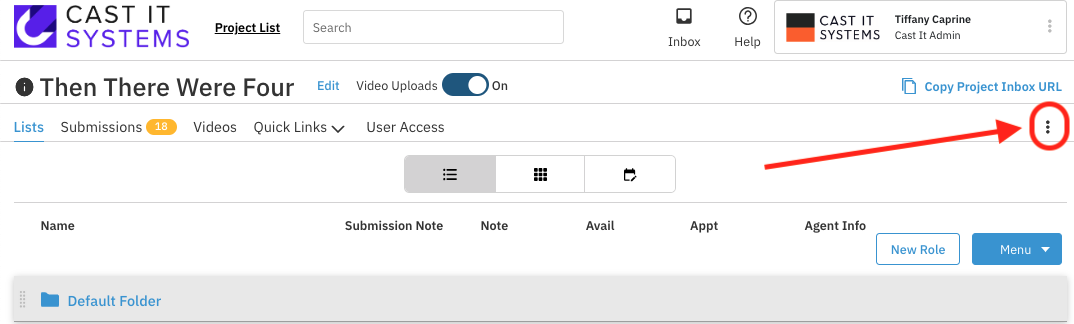
Click on the Bulk Upload option.
Press Select Files and select the files you want to upload from your finder.

Let the file upload to the bulk uploader.
Once it is uploaded, you will see it at the top of the list of files.
Select the checkbox to the left of the video and press Assign to Talent - this will allow you to assign the video to a specific talent.
NOTE: You can assign multiple videos to the same talent at once, just check off all of the videos you want to assign at the same time.

Select the following:
Role - the role you want to assign the video to.
Talent - the talent you want to assign the video to.
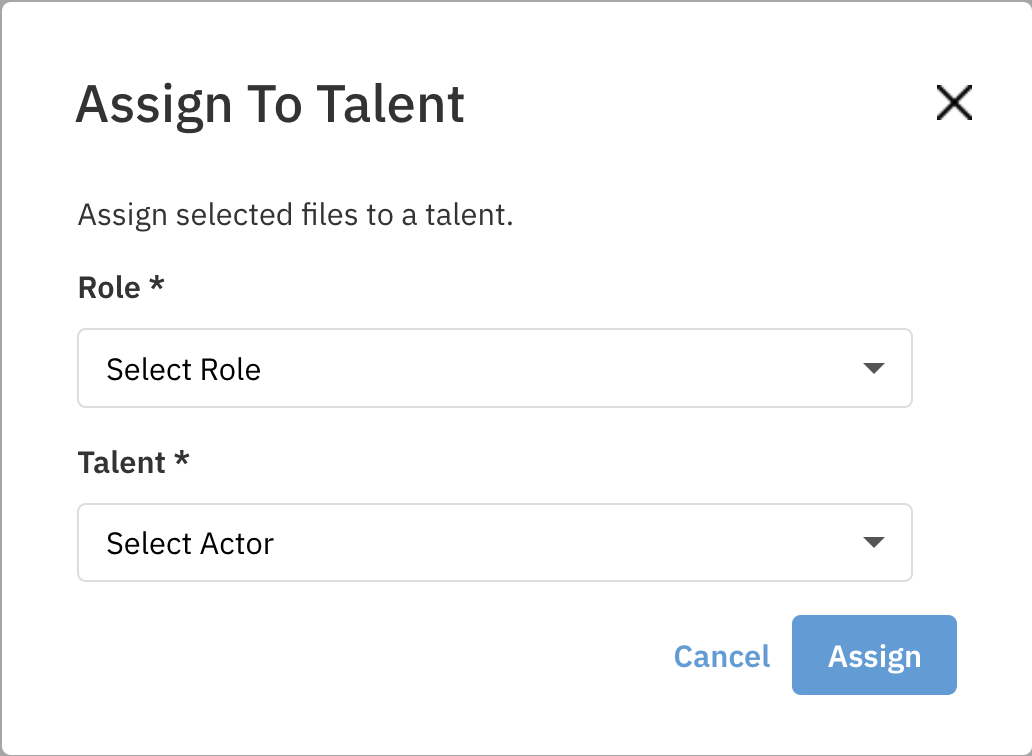
Press the blue Assign button.
Look for the green Assigned Successfully label to the left of the blue Assign button to confirm that the video was assigned to the talent of your choosing.
Upload From Within a Project using "Auto-Assign"
Login to your Cast It profile.
Select the overflow menu button.

Click on the Bulk Upload option.

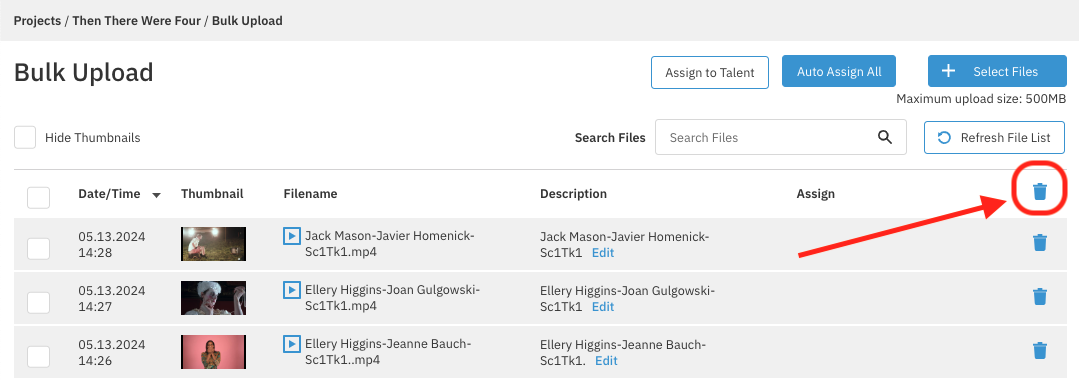
Click on the trash icon within the header column to erase all videos in the bulk uploader.
NOTE: You must clear the bulk uploader first before using auto assign, otherwise the system will re-auto-assign previously uploaded clips.
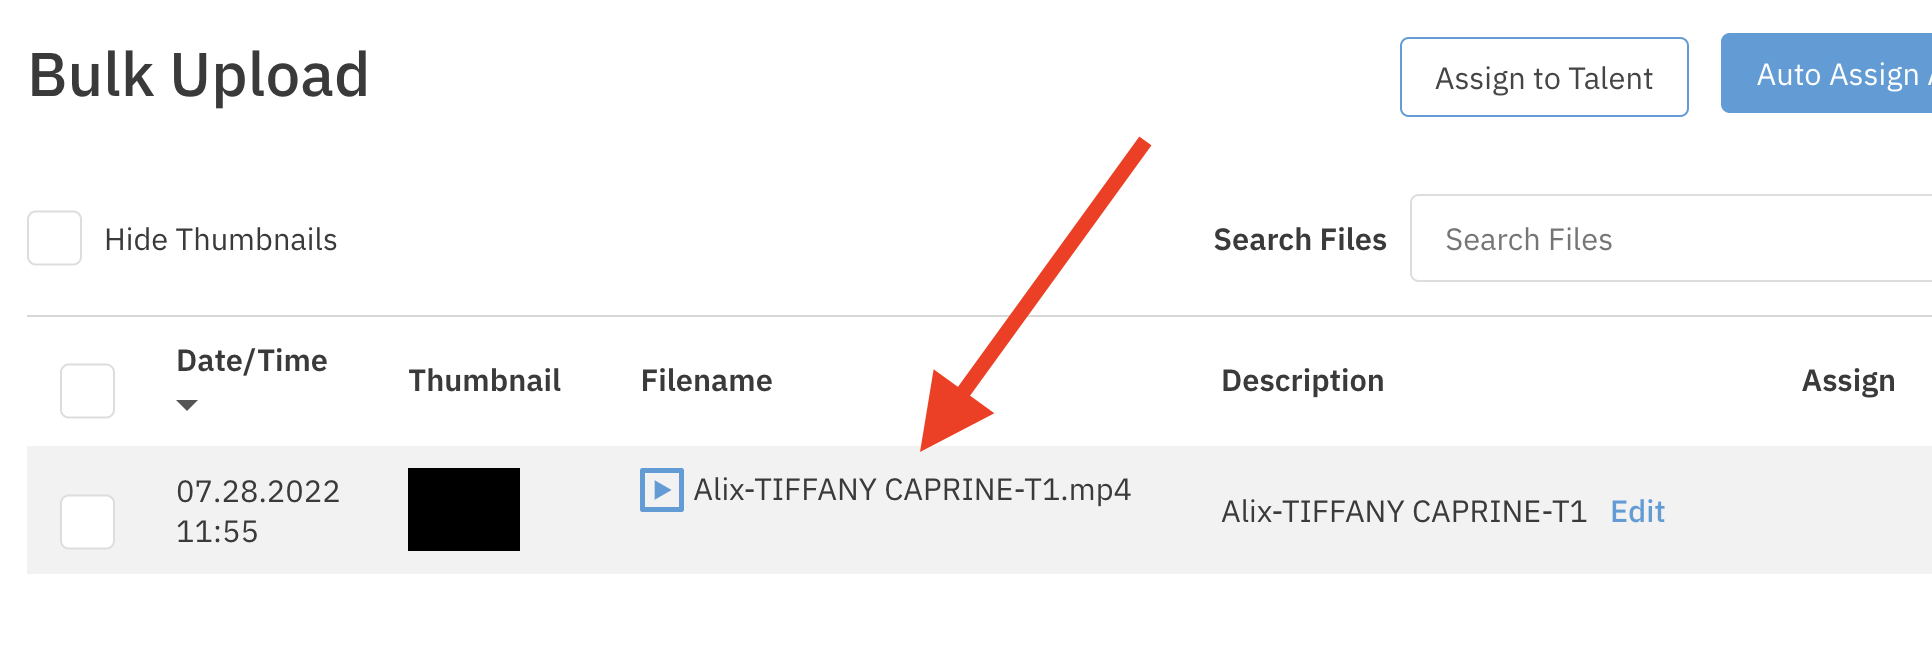
Before you select your files to upload, you will need to rename them to the correct format so that the auto-assign can register them correctly: "role name-talent name-take number" (ex. Hermione-Alix-T1).
Press Select Files and select the files you want to upload from your finder.

Let the file upload to the bulk uploader.
Once it is uploaded, you will see it at the top of the list of files.
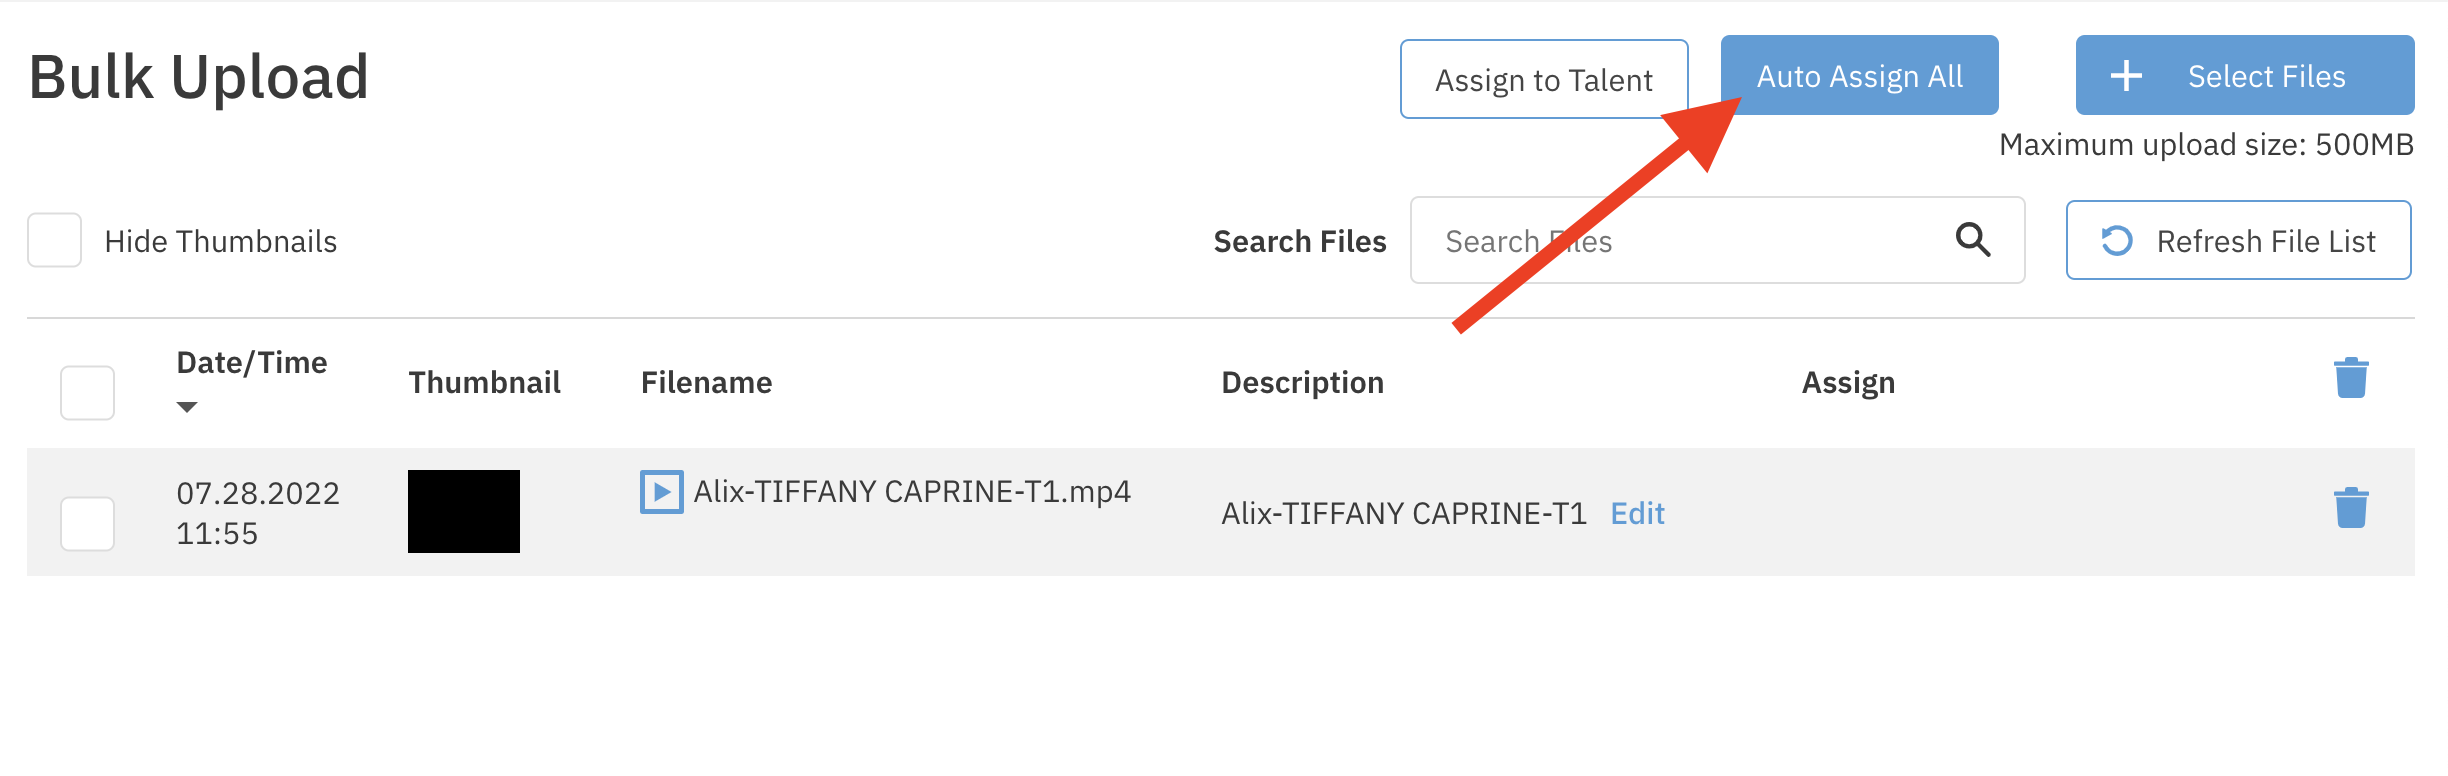
If all files are named correctly (using the "role name-talent name-take number" format) you can press the Auto Assign button.
NOTE: If you don't input a role name, it will create the role. If you don't input a talent name, it will create the talent.
Give the system a couple of minutes to auto assign the videos.
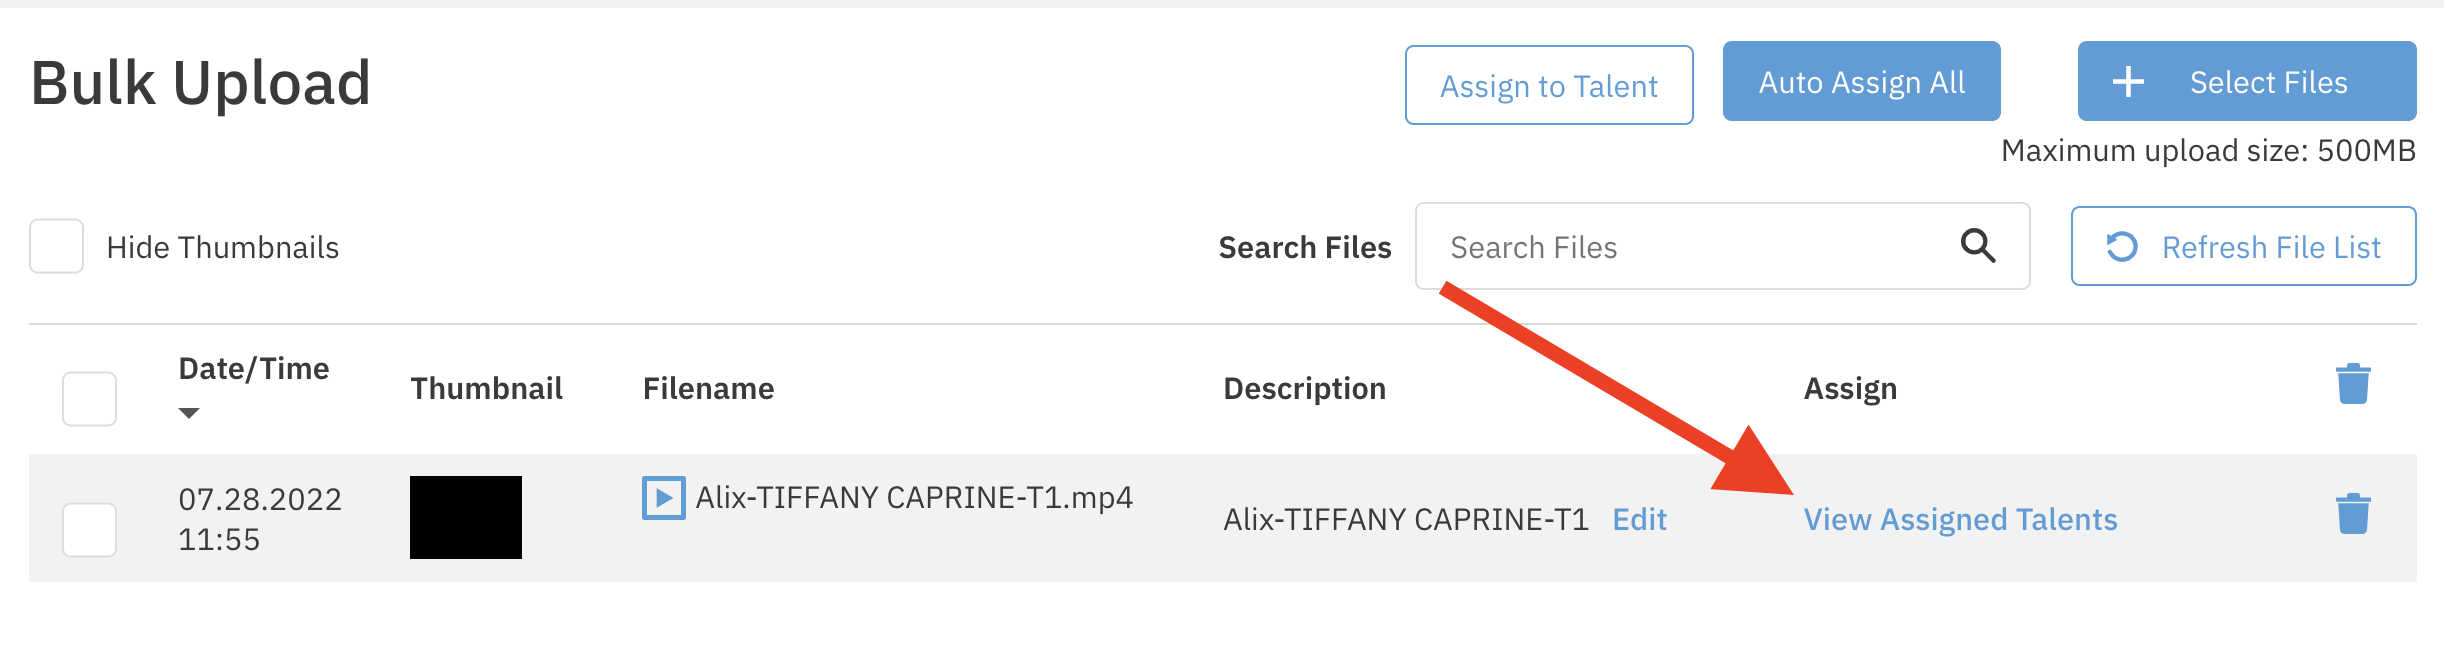
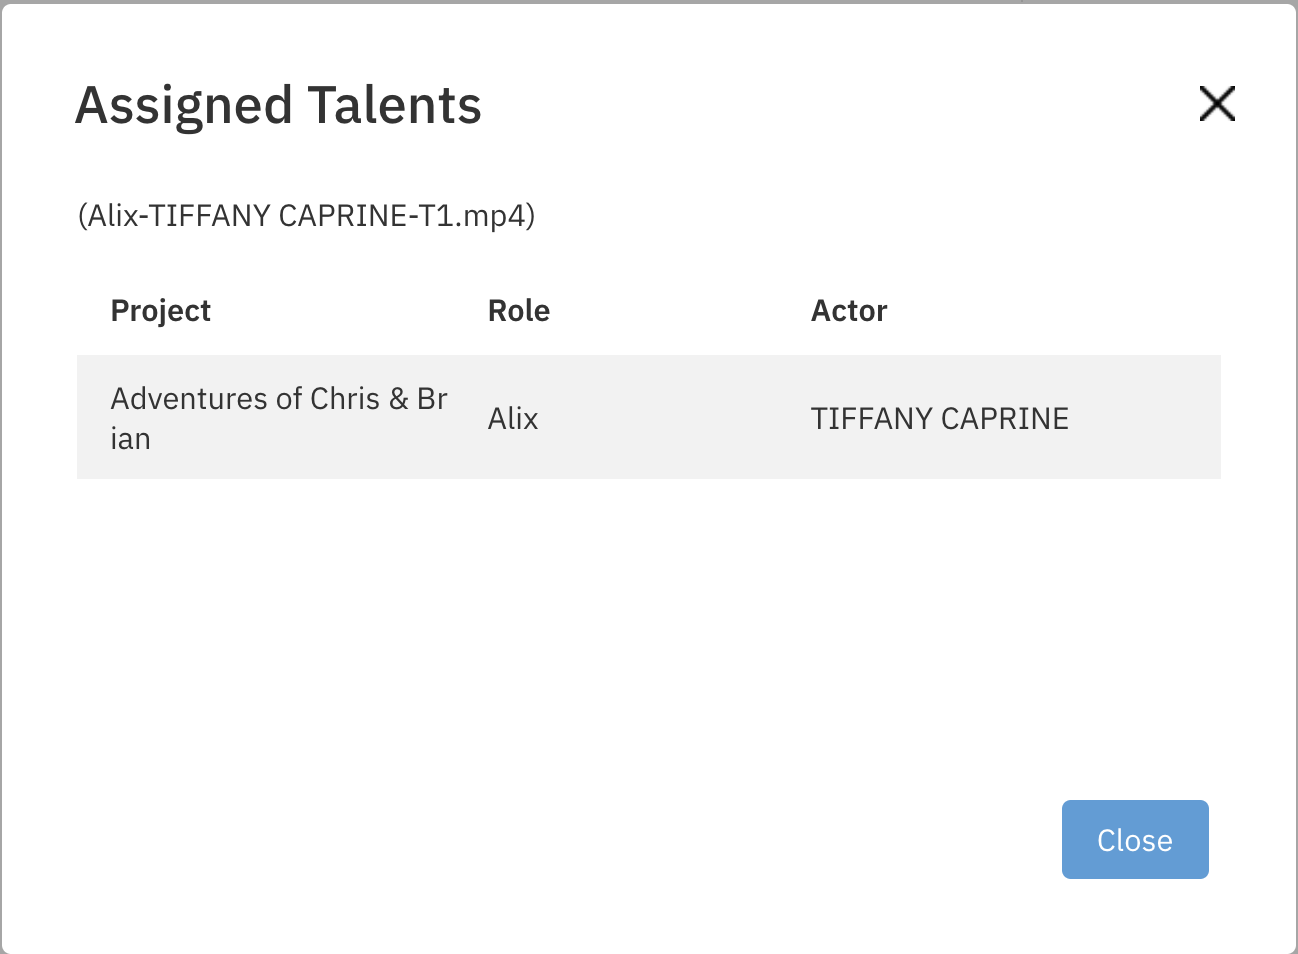
Once the videos are assigned, you will see the label View Assigned Talents.
If you click on those words, you will see who the video was assigned to, for what role, and what project.
NOTE: You can auto assign multiple clips to multiple talents at once, just make sure the clip name format is correct.